How to Set the Right Lift Height on Your Coilovers (And Why Most People Get It Wrong)
Posted by Sean Law-Bowman on
In This Article
How Coilover Ride Height Actually Works
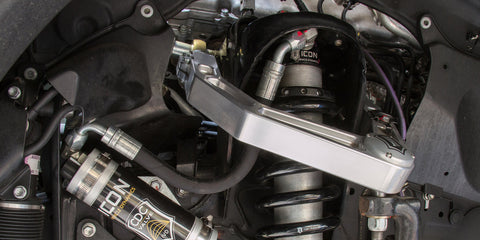
We'll keep this quick. Your springs carry the weight of the vehicle, and because they're mounted to the strut or coilover body, adjusting their position — or how much preload they're under — controls ride height.
The total extended length of the coilover stays the same. What changes is where the coilover sits within its travel range at ride height. More lift means more upward (bump) travel and less downward (droop) travel. Less lift means the opposite.
That trade-off is the whole game. Everything else flows from it.

Start Here: Trust the Manufacturer's Preset
If your coilovers come pre-assembled straight out of the box, there's a good chance the manufacturer has already set them to the optimal ride height for the most common version of your vehicle. If your rig is close to that baseline and your use case is typical, you can bolt them on and be in a pretty solid starting place.
That said, vehicle weight varies — a lot. Take the F-150, the most popular truck on the planet. Most coilover kits for that platform are optimized around a 4WD Super Crew with a 3.5 EcoBoost or 5.0 Coyote, since their curb weights are nearly identical. But if you're running a lighter 2.7 EcoBoost truck, the out-of-the-box settings will give you noticeably more lift than intended. A heavier PowerBoost Hybrid? Less.
The fix is straightforward:
- Measure your stock ride height before you pull anything apart — center of the wheel to the top of the wheel opening, front and rear, on level ground, vehicle at curb weight.
- Install the coilovers and take the same measurement.
- Compare your result to the manufacturer's target lift height.
- Adjust up or down until you're where they recommend.
Example: Your 2.7 F-150 sits at 22.5" at the factory. The coilovers are optimized for 2" of lift, but after install you're measuring 25" — that's 3" of lift. You're an inch too tall. Come down accordingly.

When the Manufacturer Doesn't Give You a Target Height
Not every kit ships assembled, and not every brand publishes an ideal lift height. When that's the case, the simple answer for most people is: set them in the middle of the adjustment range and go from there.
Every vehicle-specific coilover or adjustable strut will list a recommended range of adjustment in its specs. That range is based on how much additional travel the kit provides, with most reputable brands limiting their maximum setting to no more than a 1" loss in droop travel.
A note on Brand variation: Some manufacturers — Eibach and Icon among them — occasionally allow customers to adjust for more lift than their coilovers can really perform well at. If you're running either of those brands, we generally recommend staying back from the top half-inch of their range to preserve ride quality.
Example: A coilover with a 1–3" adjustment range and 2" of added travel, set at the midpoint (2" of lift), gives you the same droop travel as stock with 2" more bump travel. It doesn't always work out that cleanly, but the midpoint is almost always a smart baseline.
Dialing It In for Your Use Case
If your driving is more demanding than average, "set it in the middle" will only get you so far. The two extremes pull in opposite directions:

Going Fast Off-Road / Prerunning
Speed eats bump travel. The faster you go, the harder you hit, and running out of upward travel results in a violent bottom-out. For go-fast builds, you want to be on the taller end of your adjustment range — as high as you can go before topping out becomes an issue.
Using our 1–3" example, running 2.5–3" of lift may be entirely appropriate if you still have adequate droop travel remaining. Our rule of thumb: no less than 3" of droop travel on a go-fast build.

Rock Crawling / Technical Trails
Articulation is everything on technical terrain, and on independent suspension setups — which most bolt-on coilover applications use — virtually all of your articulation comes from droop. The suspension can rarely compress fully during an articulation event, but it will droop as far as it has travel to extend.
Adding more preload (more lift) takes directly from that droop travel. It also increases spring force, making the suspension harder to compress. Both work against you on the rocks.
The harder the trails, the lower your ride height should be. That said, you still want some extra bump travel for the moments when you need to push up and over an obstacle. Using the same 1–3" example, 1" of lift is often the right compromise — you pick up an inch of droop for articulation and still have a little extra squish when things get western. Our rule of thumb: no less than 4" of bump travel on a rock crawler.

How to Know When You Need to Make a Change
Numbers are useful, but the real feedback loop is behind the wheel. Here's what to listen and feel for after install:
Signs You're Running Too Much Lift
- General harshness on the trail that wasn't there before
- One end of the suspension getting sucked violently into holes or depressions
- A loud thud and a feeling of being yanked into your seatbelt as the suspension rebounds — that's topping out, and it's just as unpleasant as bottoming out
- Tires coming off the ground way too easily on uneven terrain
Signs You Need More Lift
- Constantly line-choosing to avoid minor imperfections because the suspension can't absorb them
- The hard, teeth-rattling thud of hitting your bump stops on moderate obstacles
- Insufficient clearance for the terrain you're trying to run
If you're somewhere in between — no violent topping out, no bump-stop abuse — you're probably in the window. Calibrate from there based on what the trail is asking of the truck.


When Bolt-Ons Hit a Wall: A Real-World Example
Sometimes the right lift height setting isn't enough to get you where you need to go — because the platform itself is the limiting factor.
Second-generation Xterras and same-era Frontiers are a prime example. Fantastic value for getting into off-road, but the front suspension geometry is genuinely compromised. The strut towers sit incredibly low on the frame, which limits how long a strut you can run, and the upper control arm placement clips the top of the strut tower with only marginally more travel than stock.
After testing our shop Xterra on the trail, we worked through a few aftermarket stock-width setups — the Bilstein 5100s ended up being our favorite compromise. But "compromise" is the operative word.
Stock, the front suspension has around 6–6.5" of total travel, split nearly evenly: just over 3" up, just over 3" down. The Bilsteins netted roughly another inch of travel, which barely gets you to the minimums. But even at that, we were limited to about 1–1.5" of lift before topping out became violent — not enough clearance for the trails we wanted to run, and not enough front-end height to properly match the rear for longer travel shocks.
The fix was a Titan swap. With the longer-travel Bilstein variants fitted to the swapped geometry, total front travel jumped to around 10". That allowed us to run 3"+ of lift while actually increasing droop travel over stock. The difference was night and day — the rig stopped waving tires on technical terrain and became genuinely confidence-inspiring to wheel.
The point isn't that everyone needs to swap axles. Most people won't. But if you're chasing your tail on a platform with limited travel, doing the right thing once — even if that means extended-travel coilovers with aftermarket upper control arms — will almost always cost less in the long run than stacking incremental upgrades that never quite get you there.


The Bottom Line
Coilover lift height is really a question of travel split — how much of your available travel sits above and below ride height. The right answer depends on your vehicle, your build weight, and how you use it.
- Start with the manufacturer's recommendation and adjust for any variance in your specific vehicle's weight
- No published target? Set to the middle of the range and tune from there
- Go-fast builds want more lift to prioritize bump travel — minimum 3" of droop
- Rock crawlers want less lift to maximize droop for articulation — minimum 4" of bump
- Listen to the truck — topping out means come down, bottoming out means go up
- If basic bolt-ons can't get you the travel you need, extended-travel setups with proper geometry correction are worth the investment