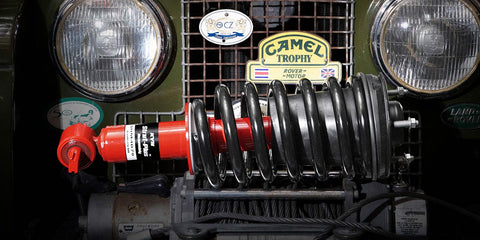
KW V3 Coilover Install on the Scion FRS / Subaru BRZ / Toyota GT86
Posted by Brandon Sevestre on
An upgrade from the upgrade.
When we first added KW Suspensions to the Shock Surplus catalog we knew we had to test out this highly revered brand on one of our rides. With a full line of trucks our options were limited. Our crew member, Nick, happily volunteered his Scion FR-S to handle the task. It's been a hot minute since Nick's car was stock, having been already upgraded on the Fortune Auto 500 coilovers, but who wouldn't jump on the chance to run KW? The whole team is very curious about how the KW's stack up to the very capable Fortune Auto setup.
What are the V3s all about, what do we expect to gain?
We expect the KW V3 to ride much more comfortably with the added compression and rebound adjustment as well as the multi rate springs while still maintaining the functional performance for tracking or autocrossing the vehicle.
What do we need to be able to install them?
The KW V3 does not include any upper mount for the front or rear. Nick went with is Raceseng front upper mount for camber and caster adjustment and KYB OEM rear mounts. For the end links, you will need adjustable or shorter end links as the stock ones would be too long when you are lowering your vehicle. Nick already has the adjustable end links which are provided with the Fortune Auto 500 set up but if you want to run the V3s you would need to buy them separately.
Backstory
Why did Nick first go with the Fortune Auto 500?
The reason I went with Fortune Auto 500 is mainly for their quality in product and what they provided. A radial bearing mount, camber adjustment plate, and upgradable to Swift springs if needed. I had previously owned Tein lowering springs and wanted to go lower and get more functional performance out of the suspension. I have also owned Tein Flex Z and Megan Racing EZ coilovers. Both of those were great for what they were but they did lack proper valving for what I was looking for. I also needed coilovers to run my new wheel and tire setup as they would not clear on stock height. I wanted to lower the vehicle regardless so it was pretty straightforward on what to do.
How did the Fortune Auto setup ride?
I installed these knowing they were going to ride more aggressively but surprisingly it’s not as bad as I thought. Although I feel a lot of the road, it’s expected for how low I am. I definitely feel the vehicle sticks more to the road when driving in a more spirited style. I ride about 16 clicks from soft in the front and 14 clicks from soft in the rear. This seems to give me the best comfort yet performance I’m looking for. I’ve tested 18 Front and 16 rear and it was too rough and also I've tried 14 front and 12 rear and it was too soft. Also need to note these at 6k front and 7k rear spring rates.
Installation Instructions
- You’ll first want to safely get the car off of the ground and remove the wheels and tires.
- Starting from the front, use a 12mm socket to unbolt the brake line bracket. You can then use pliers to remove the clips attaching the ABS line to the existing coilovers. These steps will allow you to move the knuckle out of the way when removing the coilover assembly.
- Take a 19mm socket to remove the 2 nuts securing the lower mounting bolts.
- Use a 14mm socket to remove the nut holding the sway bar endlink on the coilover and push the endlink out.
- With the coilover disconnected from the knuckle, use a bungee to hold the knuckle close to the frame.
- On these coilovers we used a 12mm socket to remove the 3 top nuts securing the coilover. (Existing setup may be different)
- The KW V3’s do not come with top mounts or camber plates. You will need to supply your own and install them on the coilovers prior to installing them in the vehicle.
- To install the coilovers, we start off with putting the top mount in place. While supporting the coilover with one hand, use the other to loosely mount 1 of the 3 bolts. This will allow you to then use both hands to secure the remaining 2 bolts.
- Insert the sway bar endlink into the coilover.
- With the endlink in place, you can then bolt the knuckle onto the coilovers. With the coilover place, you can now reattach the brake and ABS lines.
- To get the rear coilovers off remove the 4 clips holding the inner fender liner to gain access to the 2 top nuts holding the coilover in place.
- With a 14mm socket, remove the 2 top nuts.
- On the lower control arm, use the same 14mm to remove the sway bar endlink.
- Then use your 17mm socket and wrench to remove the lower coilover mounting bolt.
- With the bolt removed, you can then remove the coilover.
- Install the lower coilover into the control arm and install the mounting bolt.
- With the lower mount installed, you can then re-install the sway bar end link.
- With the lower hardware installed you can then push up the lower control arm lining up the 2 mounting studs into the upper mount and install the 2 top nuts.
- With the upper mount installed, you can then remount your inner fender liner.
- With everything torqued down, you can put your wheels and tires onto the car and lower it onto the ground.
- Once ground you can then check your ride height.
- If you need to make adjustments to your ride height, use the included spanner wrench to turn the collar to raise or lower your ride height.
So what's the verdict?
We don't know yet... these coilovers went on a week ago. We're going to fine tune the ride height and rebound / compressions settings and get back to you. Stay tuned for the full ride review video coming soon.


