Radflo 500R Sport 2.0 on the 6th Gen 4Runner: Install, Travel Numbers, and Real Tire Clearance
Posted by Sean Law-Bowman on
Introduction
In This Article
This post is all about:
- What the 500R Sport 2.0 package actually is
- How it installs on the new 4Runner
- What kind of travel changes you can realistically expect
- How much room you really gain for bigger tires
If you want to see the full step-by-step install, make sure to watch the video above. Down here, we're focusing on the big ideas, measurements, and real-world takeaways.


Radflo 500R Sport 2.0: What You're Actually Getting
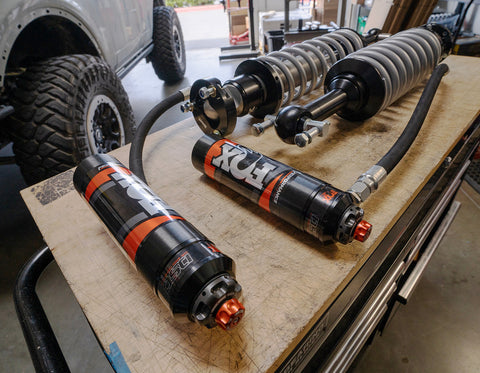
The 500R Sport 2.0 line is Radflo's new "OEM+" style package aimed squarely at modern SUVs and trucks where owners want:
- Better comfort
- Better control and stability
- Mild to moderate lift
- A package that works with mostly stock components
Here's how the lineup breaks down for the 6th Gen 4Runner.
Front: Coilover Options
- 2.0" monotube coilovers
- Available:
- With or without remote reservoirs
- In standard travel and extended travel versions
For this 4Runner, we went with:
- Standard travel, non-reservoir coilovers up front
- Good for stock height to ~2" of lift
- Fully compatible with all stock front components
This is the option we expect most people to pick. Bolt-on, no extra parts required, simple alignment, and a nice bump in performance.
If you already have aftermarket upper control arms, you can step up to the extended travel coilovers:
- A bit more stroke
- Up to about 2.5" of lift up front
- More droop (down travel) for articulation
Rear: Shock Options
In the rear, Radflo offers:
- Standard travel 2.0 shocks that work with stock springs
- Longer-travel rear shocks designed for 2" lift springs
If you already have a lift spring picked out—like a 2" rear coil—you can pair it with their long-travel rear shocks for extra articulation and better control at full extension.
The Trick Up Their Sleeve: Secondary Rebound Pistons
What makes these coilovers stand out at their price point is the secondary piston design on rebound.
In plain English:
- They're designed to offer extra support near the top of the stroke
- That helps prevent harsh top-outs (that knocking or banging feeling when a shock hits full extension)
- It's a similar concept to what we've liked in other kits like Fox HTO and other position-sensitive designs
This is especially important on vehicles where you're adding lift and running heavier wheels and tires, because topping out the suspension constantly is a fast way to end up with a harsh ride and worn components.
Radflo's goal with the 500R Sport 2.0 seems clear: Make something optimized for the average driver who wants a little lift and a lot more comfort and control—without ruining ride quality.


Our Test Mule: 6th Gen 4Runner on 33s (Already)
Our 4Runner is already sitting on:
- 285/70R17 tires (roughly a 33" tall, ~11.5" wide tire)
- 17x8.5" +25 offset Method wheels
At stock suspension:
- This combo cleared just fine
- No major rubbing issues in day-to-day use
So the big questions for us were:
- How much travel do we gain with the 500R Sport 2.0 kit?
- How much room for bigger tires do we gain in the process?

Why Suspension Travel Matters
We're guilty (like a lot of the industry) of talking about lift height more than travel, but both are equally important.
When you lift a vehicle, you:
- Extend the suspension further at ride height
- Reduce how much up-travel you have if the shock length doesn't increase
- Risk more frequent top-outs (harsh extension) if droop travel decreases
If you add 2" of lift but don't gain any more travel:
- The suspension is spending more time near the top of the stroke
- Ride can get harsh on rebound
- Articulation and overall comfort suffer
The Radflo 500R coilovers are interesting because they:
- Add some extra droop travel
- Reposition bump and droop limits
- Use that secondary rebound piston to soften top-outs
We wanted to see how that all plays together on the new 4Runner.


How We Tested: Springs Off, Full Cycle, Real Measurements
To get real data (not just "it feels better"), we:
- Removed the coil springs
- Cycled the suspension from full bump to full droop
- Measured total travel stock vs. Radflo 500R
- Threw the wheels and tires back on
- Steered from lock to lock throughout the travel to see what hits
This gives us:
- Actual travel numbers
- Clear understanding of bump and droop limits
- Real-world tire clearance data instead of guesses

Travel Numbers: Stock vs. Radflo 500R
Here's what we saw on this 6th Gen 4Runner (TRD Sport / i-Force Max):
Front Suspension
- Stock front travel: ~7 1/8"
- Radflo front travel: ~7.5"
So travel gain up front was small—about 3/8" more total travel.
But that doesn't tell the whole story.
The Radflos:
- Allowed the suspension to extend ~1.75" farther than stock
- Did not compress as far at full bump
- They "bump out" about 1–1 3/8" higher than stock
What that means in practice:
- You're not getting a massive increase in total travel
- You are:
- Maintaining droop travel, even with up to ~2" of lift
- Keeping the suspension out of the harsh top-out zone
- Gaining a lot more tire clearance at full bump
Rear Suspension
- Stock rear travel: ~8 1/4"
- Radflo rear travel: ~8 1/4" (no change in total travel)
On paper, that's disappointing if you're chasing articulation, but remember:
- The 4Runner sits very low in its travel from the factory
- It's already very close to bottoming out in the rear
- Extending the shocks a bit with lift can be a good thing here
If you want big articulation gains, that's where:
- 2" lift rear springs
- And Radflo's longer-travel rear shocks
start to make a lot more sense.


Tire Clearance: Where the Radflos Really Shine
Even before the Radflos, with the stock suspension:
- A 285/70R17 (~33") on an 8.5" +25 wheel was in pretty good shape
- We're confident a 34" tire of similar width could be made to work with minimal trimming
With the Radflos installed:
- Tire clearance only got better
- Because the shocks don't compress as far at full bump, the tire has more room in the fender
- The front now has a higher bump point, which is a big help if you're chasing larger tires
Our takeaway:
- If a 34x11.5 will fit with stock suspension and some mild trimming
- A 35" tire of similar width should be very realistic with the Radflo 500R setup, especially with:
- 1 3/8" or more of lift
- An 8.5" wide wheel
- +25 to +35 offset
That keeps the tire tucked, preserves geometry, and maximizes your usable bump travel.

Real-World Lift and Pairing With Rear Springs
On our hybrid / i-Force Max 4Runner:
- We saw ~1.5" of lift in the front right out of the box
If your 4Runner is not a hybrid:
- You can expect closer to 2" of lift up front with the same coilover settings
We paired the Radflo 500R kit with:
- 1.5" Dobinsons rear lift springs
This ended up being:
- A really nice match to the front
- A big improvement over how low and prone to bottoming the 4Runner is from the factory
- A combo we'd recommend if you're lifting the rear at all
Out of the box, if you don't touch the rear, the truck should sit pretty level with the Radflos. But given how Toyota has these sitting deep in the rear travel:
- We think at least a mild rear lift is almost a must if you carry cargo, passengers, or hit rough roads often.

How Do the Radflo 500R Sport 2.0s Actually Feel?
We're still early in our testing, so we're not stamping an "all-time favorite" label on them just yet but first impressions are very positive.
So far, they've delivered exactly what Radflo seemed to be going for:
- OEM+ comfort
- More stability without feeling harsh
- Better control over big bumps and repeated hits
- A noticeable reduction in harsh top-outs
They do everything the stock suspension does well - just more confidently - and they really clean up the areas where the stock stuff falls short.
We'll have a dedicated ride review and trail test coming once we get our usual mileage and abuse on them.
Who Is This Kit For?
The Radflo 500R Sport 2.0 package is a strong fit if:
- You daily drive your 6th Gen 4Runner
- You want 1.5–2" of lift without wrecking ride quality
- You want room for 34s or even 35s with the right wheel setup
- You value comfort and control over max-travel, race-truck flex
If you're chasing big articulation and long-travel performance, you'll want:
- Extended travel up front
- Longer-travel rear shocks
- Lift springs and supporting mods to match
But for most owners who want a civilized daily, capable on weekend trails, this kit is absolutely in the conversation.

2025+ Toyota 4Runner Suspension Installation Steps
The following instructions cover the steps to replace the front coilovers, upper control arms, rear shocks, and rear springs on your 6th Gen 4Runner.
- Remove wheels
- Remove cotter pin on the outer tie rod
- Using a 24mm socket/wrench remove the outer tie rod nut
- Using a 12mm socket/wrench disconnect the brake/abs lines on the spindle and upper control arm
- Using a 22mm remove the lower sway bar end link
- Using a 22mm/wrench remove the lower shock mount bolt
- Using a 14mm wrench remove the upper strut mount nuts
- Remove the strut from the lower mount and remove strut from vehicle
- Remove cotter pin from the upper control arm ball joint to the spindle using pliers
- Using a 19mm socket/wrench remove the upper control arm ball joint nut and separate the ball joint from the spindle
- Using a pick, or similar tool, remove splash shields from both sides of the frame
- Using a 22mm wrench and 22mm socket, remove the upper control arm nut and bolt from the frame
- Using a bungee or wire, support the spindle to the frame to prevent damage to the lines and CV joint
- Remove the upper control arm
- Install the new control arm in the reverse order
- Using a 22mm wrench and 22mm socket tighten the upper control arm to manufacturer specifications
- Using a 22mm socket tighten the ball joint nut to manufacturer specifications
- Install the new coilover and temporarily install a nut to the top mount
- Install lower shock mount to the lower control arm making sure to install the alignment spacers in the correct order. Using a 22mm socket, tighten to manufacturer specifications
- Using a 14mm wrench tighten the top mount nuts to manufacturer specifications
- Reinstall the outer tie rod and using a 24mm socket, tighten to the manufacturer specifications. Make sure to reinstall the cotter pin once the ball joint has been tightened
- Using a 12mm wrench reinstall the brake and ABS line brackets
- Reinstall the splash shields
- Reinstall the lower sway bar end link. Use a pry bar to carefully align the holes and insert the bolt. Using a 22mm socket tighten the bolt to manufacturer specifications
- (This step is specific to Icon UCA's) Install the UCA ball joint beauty cover
- With the vehicle supported on stands or a lift remove the rear wheels
- Support the rear differential with a jack or an adjustable jack stand
- Using a 17mm wrench remove the sway bar end link from the frame
- Using a 22mm wrench remove the upper shock mounting nut. If necessary use vise grips or a 8mm wrench to hold the shaft from spinning at the top.
- Using a 17mm socket remove the lower shock bolt
- Remove the shock from the vehicle
- Using a 12mm socket remove the brake line tabs to allow the differential to be lowered without pulling the lines and damaging them
- Lower the differential slowly until the spring can be removed. Be careful not to extend any brake lines or wires
- Remove the spring from the vehicle
- Before installing the new spring, be sure to install the spring isolator from the stock spring
- Install the new spring. An extra hand may be useful by pressing down on the differential while installing the spring
- Install the misalignment spacer and install the shock on the lower mounting. Using a 17mm socket tighten the lower shock bolt to manufacturer specifications
- Install the upper shock stem ensuring the proper bushing and washer orientations
- Using a 19mm tighten the upper nut to manufacturer specifications. If necessary use a vise grip or 8mm wrench to hold the shaft from spinning
- Using a 12mm socket, reinstall the brake line tabs
- Reinstall the sway bar end link. Using a 17mm wrench or socket, tighten to manufacturer specifications
- Reinstall the wheels and torque to manufacturer specifications