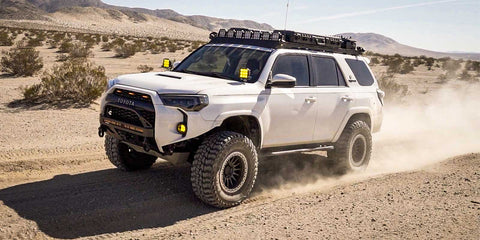
Dobinsons MRR 3" Lift Kit Install - 10 Inches of Front Travel on this 2022 Tundra
Posted by Sean Reyes on
Spacer's Effect on Usable Travel
Leveling spacers, lift spacers, spring spacers, leveling kits - all of these similar names for late model IFS (Independent Front Suspension) trucks like the Tundra, Tacoma, F-150, Silverado, and others, accomplish only one thing - taller ride height.
But most drivers don't realize the compromise with these kits, namely actual usable wheel travel - specifically down travel (sometimes called droop).
droop [ drüp ]
verb
- to hang or incline downward
noun
- the measured distance of downward travel available on a vehicle's suspension (the opposite of compression)
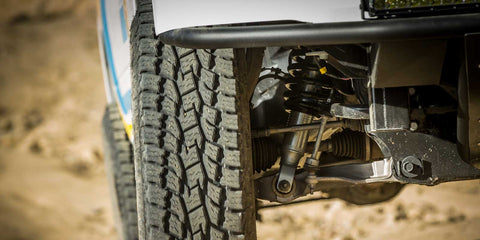
Down-travel is how far your wheel / suspension can lower away from the chassis, based off normal ride height. In the case of the 2022 Tundra we worked on, there was about 7.5 inches of front wheel travel; so at ride height there was +/- 3.75 inches of travel up and down.

Strut & Spring Spacers Reduce Suspension Travel
When introducing a strut spacer or spring spacer, like this Tundra customer had done in order to clear larger tires, comes with a sacrifice to droop travel. More specifically, by using a spring spacer from a popular manufacturer, that preloads the factory coil springs, this added 2.5 inches of extra ride height, at the expense of that much droop travel.
So now the suspension only had about 1.5 inches of downward suspension travel, making the shock the limiting strap. Additionally, the compressed shock length is increased, limiting bump travel as well.
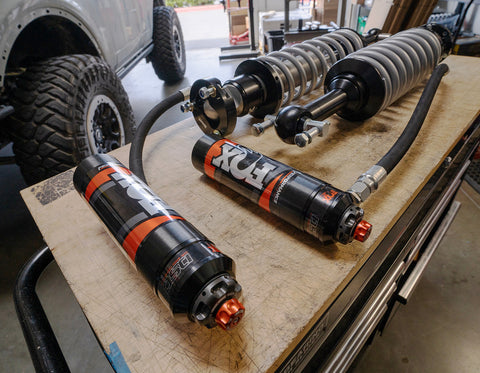
The Dobinsons shocks fixed all of this, not only providing 3 inches of lift the customer desired, but increasing net travel up and down over the factory suspension.

This is accomplished with proper rated springs, and longer front shocks that cycle much more travel than stock, while gaining significant ground clearance for larger tires and obstacles.


Installation Steps - Dobinsons MRR Suspension - Toyota Tundra
- Start the front coilover install. Remove skid plate.
- 12mm socket to remove 2 bolts that hold brake line and ABS bracket to UCA and spindle
- 19mm socket to remove lower sway bar end link from LCA
- Remove cotter pin from tie rod nut / stud and use 24mm socket to remove tie rod nut
- Using a 22mm socket, remove the two bolts from the bottom side of the spindle
- Remove lower shock bolt using a 22mm socket
- Remove upper shock mount bolts using a 14mm socket
- Start with the rear nuts and when removing the final nut, have someone help support the strut assembly so it does not fall out when the final nut us removed
- Use a proper spring compressor on the stock assembly, use a 19mm socket to remove the factory top nut from the strut assembly
- Assemble the new coilover using the factory top hat
- Tighten lower strut mount bolt with 21mm wrench and socket
- Loosen the hose clamp closest to the engine with a 10mm socket
- Lift up on the intake box to remove, it is only held in place by rubber grommets under the box
- Unplug the small grey connector next to the ECU
- To unplug the ECU harness, push down on the safety latch and push the lever the opposite way, the connector will then lift up and you will be able to remove the plug completely
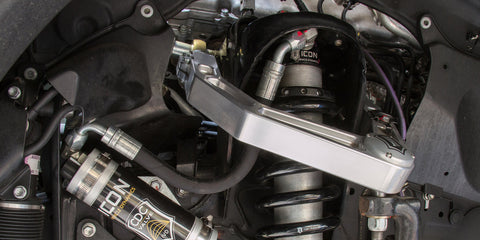
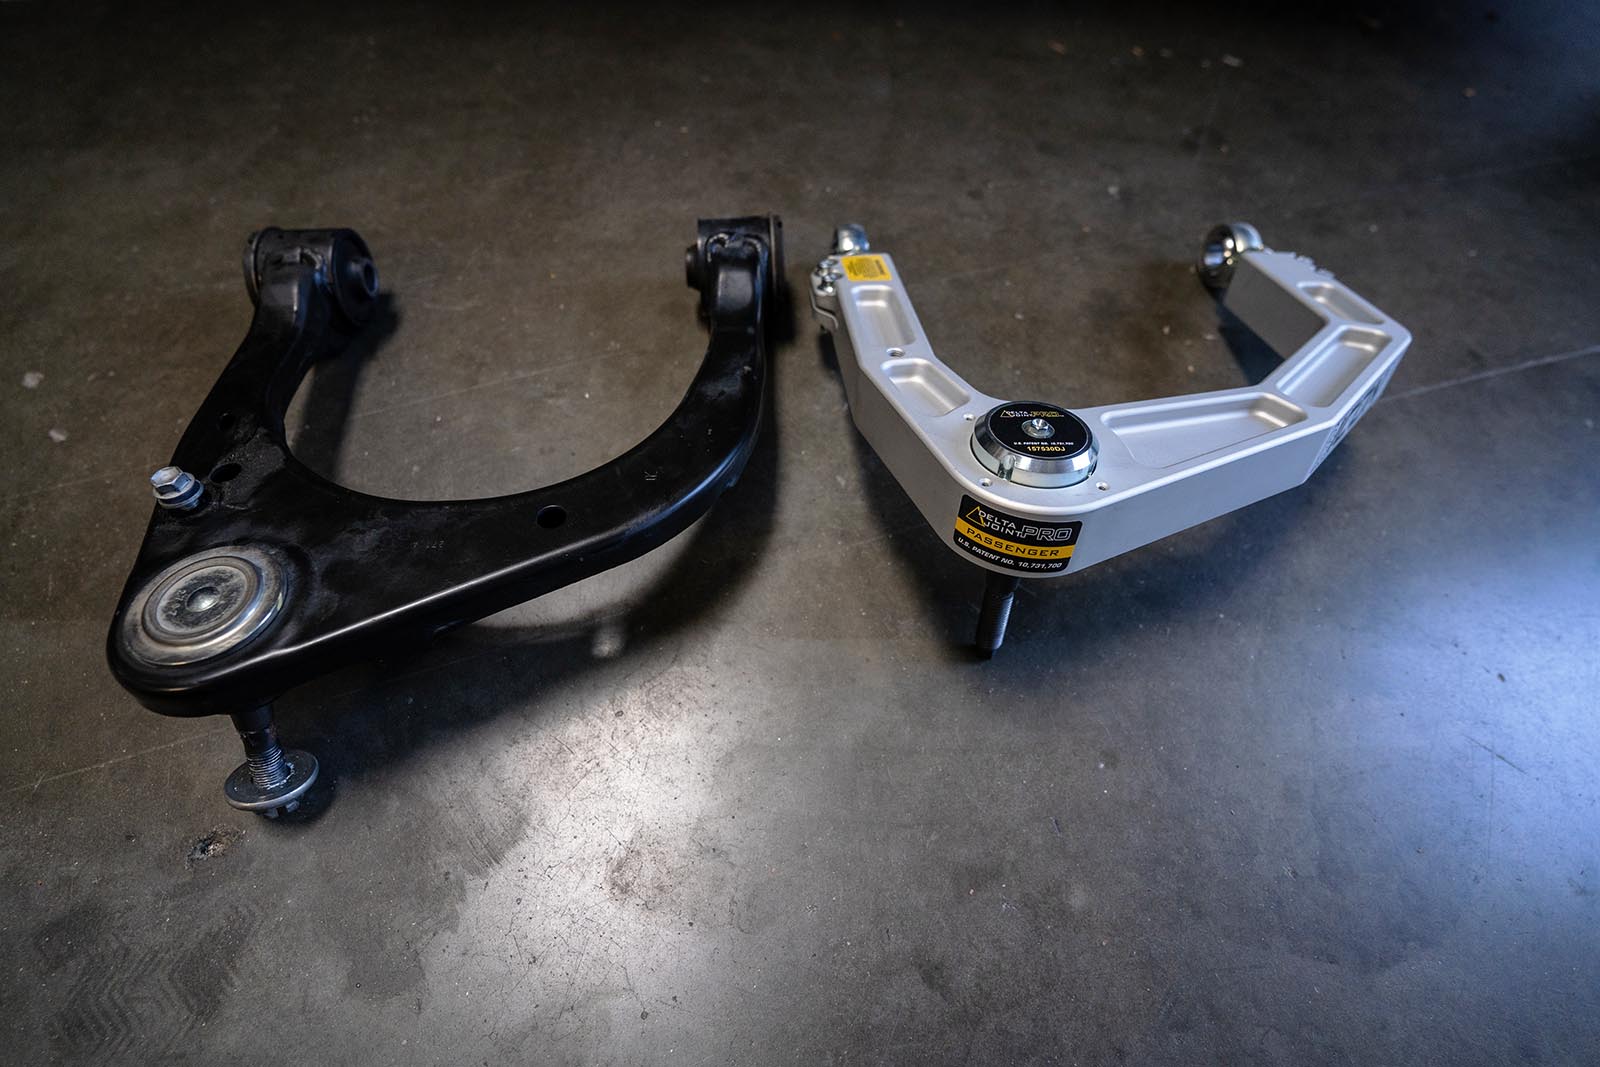
- Remove factory UCA
- Install the aftermarket UCA (Icon Vehicle Dynamics in this case) into position using the OEM pivot bolt through the spacers and the frame
- Install the delta joint dust cap with o-ring using the included screws and loctite
- Use a 17mm socket to unbolt the 4 sway bar bracket bolts, remove the sway bar
- To install the reservoir bracket, remove the smaller frame cap using a flathead screwdriver
- Slide the reservoir clamp on the reservoir
- Holding the nut in the frame hole, thread the reservoir mounting bolt
- Clamp the reservoir hose to the forward hole on the reservoir mounting bracket
- Install the Icon sway bar drop spacers in between the frame and the sway bar bracket
- The smaller / shorter spacer will be positioned in the front and the longer spacer in the rear
- Use the included longer bolts from the Icon and tighten with 19mm socket
- Start the rear shock install. Unbolt brake line brackets from the axle using a 12mm socket
- Using a 17mm socket, remove the nut holding the sway bar endlink to the frame
- With a 19mm wrench, remove the nut from the top of the factory shock
- Remove the lower shock bolt with a 17mm socket, remove the shock
- Remove the stock spring
- Remove the factory spring insulator off the stock spring and install on the new springs
- Install the new springs; they are significantly longer than stock so you will likely need two people to get them in, one to put weight on the axle so it droops enough to get the spring in
- Insert the lower shock mount onto the shock mount stud on the axle, then the upper shock mount into the frame
- With the 19mm wrench, tighten the upper shock mount nut
- Then use the 17mm socket to install the lower shock bolt
- The rear reservoir will be mounted to the shock body, use a 4mm allen wrench to tighten the reservoir mounting bracket